7) Decide if you will want a background picture or fill color.
The background node is automatically included in each design as a default setting. You may leave this background node unfilled…or you can choose to drop in an image and use the Pager controls to change the Opacity . You can even convert that background image to black and white (by clicking on . You can even convert that background image to black and white (by clicking on  and then clicking on a B&W option button). You may also choose a to Fill and then clicking on a B&W option button). You may also choose a to Fill the background with a color. the background with a color.
For this example let’s use the eyedropper in Fill  to bring in colors into the background that will tie the picture elements together. First, turn off the grid by un-checking the grid items. Then: to bring in colors into the background that will tie the picture elements together. First, turn off the grid by un-checking the grid items. Then:
a.Activate Pager and select the background by using the Edit  tool.
b. Click on Fill  and then check the Fill box.
c. Click on the Sample Color  button.
d. Place the eyedropper in various positions and click until you find a color that is pleasing. In our case we found a nice “peach” color in the hat in the upper left-hand picture. As soon as we clicked it the color filled the background. (Note that you could choose any color swatch, including white from the boxes in the Fill window.)
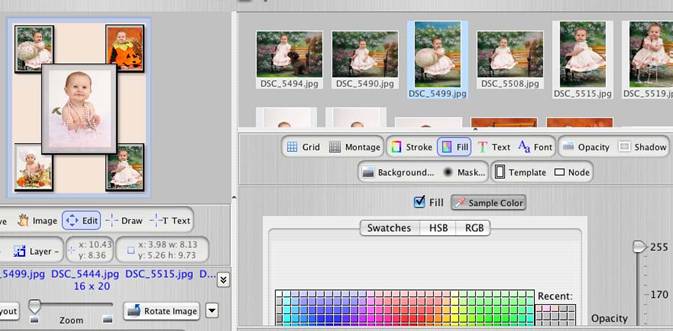
e. Since the peach color is a bit too dark we’ll modify it by lowering the opacity of the fill.
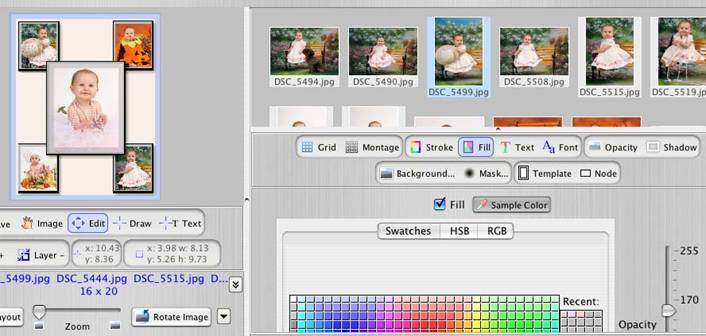
8) Change the stroke color.
We’re going to use the Stroke  tool to change the black stroke to white. Simply select each of the picture nodes by using the Edit tool to change the black stroke to white. Simply select each of the picture nodes by using the Edit  tool and then click on a white swatch box. tool and then click on a white swatch box.
Here’s the collage we have up to this point:

A Design Your Own
16” x 20” Collage With A
Sampled Background Color
9)
Let’s personalize the collage with some type.
a. Click on the Pager  button to activate the Pager tools.
b. Click on the Text  button. You will activate a set of cross-hairs. Drag the cross-hairs over the layout window to create a text box.
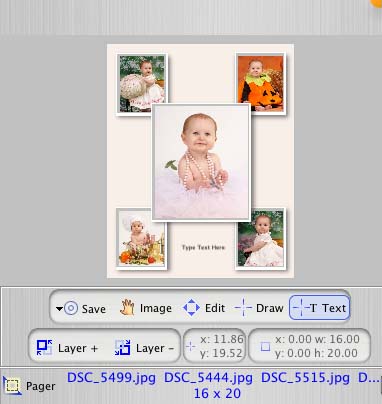
c. Click on the Edit button and use the Edit tool to select the type node within the layout.
d. Click on the Node  button and the node options window will open. This window will give you a choice of 14 fonts that are within our system. (You may also choose your own font, from within your computer’s system by clicking on the Font  button. However, your system fonts will render as pictures and may not be as sharp as the fonts we supply.)
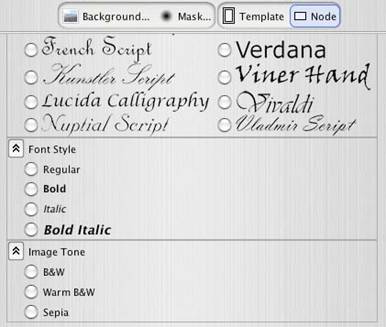
e. We are going to choose Edwardian Script by clicking its radio button. (Since this font happens to be within this writer’s computer it will render properly on the screen. However, if you did not have exactly the same font in your computer’s system it would not render correctly on your monitor but would print correctly on your printed enlargement.)
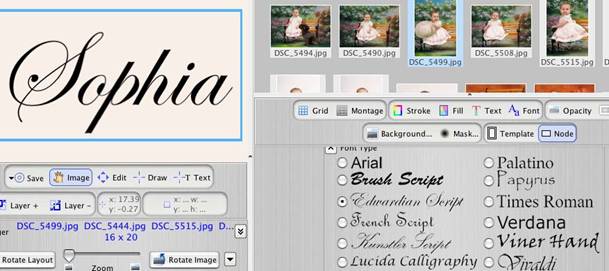
f. Click on the Text  button to select the color of the type. In our example we’re again going to sample colors from within pictures by using the eyedropper that is activated when we click on the Sample Color  button. We double-clicked on the picture on the lower left to enlarge it and then used the eyedropper to sample the color of the small tomato. That changed the type to the red you see in this final rendition. The type was then sized and precisely placed between the photos by using the Edit tool.

A Design Your Own
16” x 20” Collage With A
Sampled Background Color And Text!
At this point you can click on the Pager  button to turn off the Pager tools and you have a ready-made template. You can drag-and-drop images into each of the nodes and use the Zoom and Image tools to individually crop each picture. button to turn off the Pager tools and you have a ready-made template. You can drag-and-drop images into each of the nodes and use the Zoom and Image tools to individually crop each picture.
|


