
Composite enlargements (called Collages) contain multiple images on a single sheet of photographic paper.
Composites are generally designed as free-form layouts, as opposed to montage enlargements, which show a precisely ordered grouping of different photographs on the same print (and are defined by row-and-column set-up windows in ROES.)
You should be able use our Design Your Own option…with Pager…to create your first Collage design in under an hour. You’ll pick up speed with subsequent designs.
Best yet, you’ll be able to save every design you create (under My Templates) so that you can recall any template for future use. Once recalled you can just drag and drop new images into the template in seconds, creating beautiful montages that will impress your clients and give you nice profits.
We’re going to show you how to use ROES tools to create the basic Collage layout you see here. From there you should find it easy to do your own creations.
If you are interested in learning how to do a Montage, with defined rows and columns of photographs please click here.
A Design Your Own
16” x 20” Collage
Designing a Basic Collage (Composite Print)
 You can create a Composite Print from any “Design Your Own” enlargement size. You can create a Composite Print from any “Design Your Own” enlargement size.
Begin by opening a Sizes Palette (if one is not already open) by clicking on the Sizes button. button.
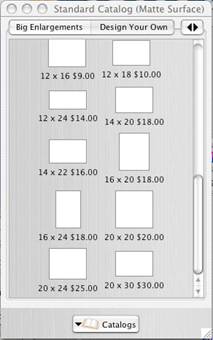
Then, select the Catalog you want (i.e. Matte, glossy or Metallic paper) by clicking on Catalogs in the pop-up menu that will open. Select the Show Sizes Palette… from the pop-up menu. You’ll see all the available print sizes you can choose from. (If you have a catalog already open you can change catalogs by clicking on the  button at the bottom of the catalog sizes window.) button at the bottom of the catalog sizes window.)
This example shows the Matte catalog. We’ve used the scroll bar to just show the bigger enlarging sizes of the Matte catalog. However, a montage can be made on any customizable print size in our catalogs.
Click on the Design Your Own tab at the top of the palette window to select customizable sizes.
Now, click on the enlargement size you want to make. In our example we will click on the 16” x 20” graphic.
Choose the pictures you want to include in your Composite by clicking on the Folder… button. You’ll be selecting the folder containing your image files from your computer’s hard drive or a CD. Thumbnail image of your photos will appear on the right of your monitor window. button. You’ll be selecting the folder containing your image files from your computer’s hard drive or a CD. Thumbnail image of your photos will appear on the right of your monitor window.
Here’s the screen you should be seeing:
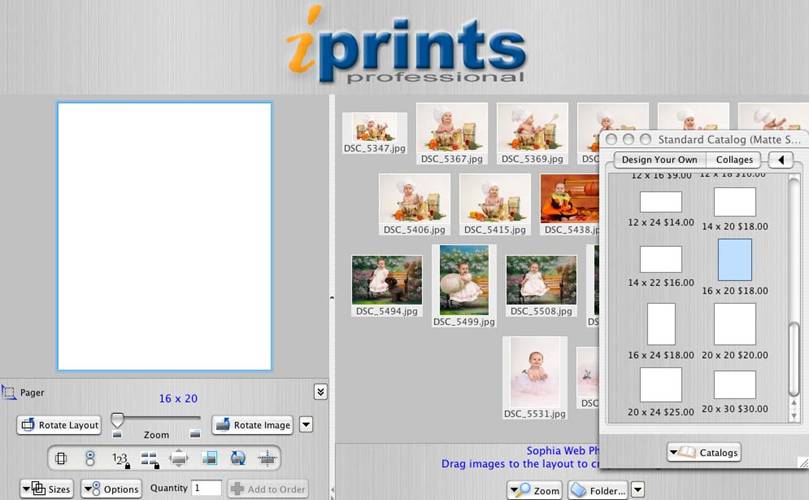
Now you can begin working on your Composite!
|
