Modifying Node Sizes Within Your Layouts
Here are the layout window and the finished design for our basic montage. We’re going show you how to take this starting design and modify its elements.
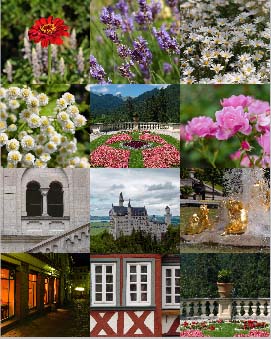 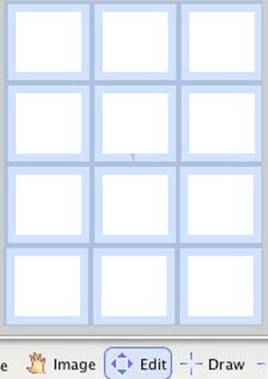
What’s missing from this design? Although this basic montage looks good, there are some items you might want to improve.
First, all the pictures are square…even though their original shapes were rectangular.
Second, we may want to enlarge some of the image nodes to take a bit of the “sameness” out of the design.
Finally, we might want to add text to the montage.
To make these changes we are probably going to want to remove at least a few of the nodes to make space for the nodes we’re going to accentuate. Let’s take a look at a few steps illustrating how this can be done:
Let’s start by making the central picture of the castle larger. Here are the steps we’ll use:
1) Use the Zoom slider to make the image larger in order to visualize how it will look with the other nodal elements when it’s made larger and more important.
2)
Decide which other nodes you would like to remove to make the picture of the castle larger. In our case we’re going to remove the garden picture above the castle and the fountain and flower pictures to the right. To do this we are going click on the Pager  button and then select each of the nodes to be removed with the Edit  tool. Now, right-click on a PC or Command/Control click on a Mac to bring up our option menu. Select Remove from the pop-up menu and give an OK to remove the nodes. Here is what you’ll see:
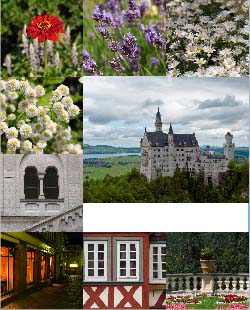 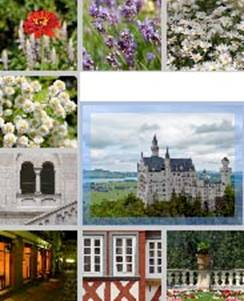 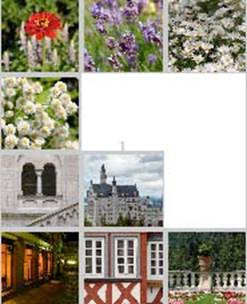
3) Click on the castle’s node with the Edit tool and adjust its shape and size.
4) Then, use the Edit tool to move the node higher within the layout window.
5) Now, extend the tops of the bottom two nodes upward, again using the edit tool.
6) Let’s add some type.
a. Start by creating a picture node to use as a background for your type. Use the Draw  tool to create the box. Then, click on the Fill  tool and check the box for fill. In this case we’re creating a white background box. However, you can choose any color or sample a color from your images. Using the Opacity  tool you will be able to lighten or darken any color you choose for your background box.
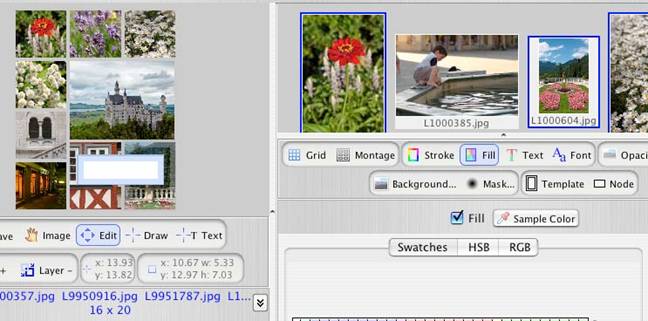
b. You will probably want to add a stroke to the graphic background by clicking on the Stroke  tool. A line thickness of .1 usually works well for this size print. You can choose black or any color. Perhaps you’ll want to pick up a color from your subjects for your stroke and match it to your type with the Sample Color  tool. You can do this now or later.
c.
Now we’ll create a text box within our graphic background. Click on the Text  tool and draw a text box inside the graphic box. Position your text box within the background box.
Tip: Toggle back and forth with the Pager button (to activate or deactivate the Pager tools) to see how your background image looks while sizing and spacing it. When you’re satisfied, click on Pager again and draw your text box within the background.
d.
At this point it would be a good idea to choose your font. Click on the Image  icon. Then, double click on the text node to enlarge it. With the text box still selected click on the Node  button. You’ll see this option screen open:
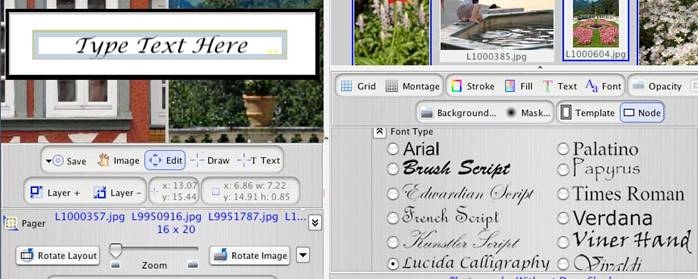
Note that we’ve chosen Lucida Calligraphy.This is one of 14fonts that can be printed through our laboratory. Since this font was in our computer’s system folder it rendered correctly on our monitor as an accurate font image. However, if you don’t have an exact font match within your computer’s system it will not render visually on your monitor but will be properly rendered and printed on your enlargement.
You also have the option of choosing a font from within your computer system. Simply click on the Font  tool and select the font you want. Please bear in mind that your font will be rendered as a picture image and may not be as sharp as one of the 14 fonts we offer, which render on your enlargement as very sharp type. tool and select the font you want. Please bear in mind that your font will be rendered as a picture image and may not be as sharp as one of the 14 fonts we offer, which render on your enlargement as very sharp type.
e.
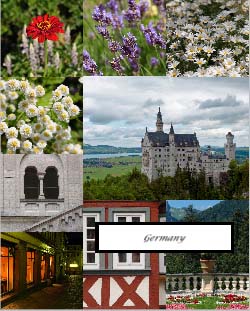
Click on the Pager button to come back to your montage layout. Click on the enlarged image of the type box and it will come back to normal size. Now we’ll type in “ Germany” to complete our montage. Here’s what we have:
Making Changes:
After looking at the design we have decided we didn’t like the type box as large as the design to the left. We would also like the type in “ Germany” to be a different color, matched by the surrounding text box. So, we clicked on Pager and utilized the Edit, Stroke and Type tools to make our changes to the graphic box containing our type and our bottom picture node. Our final layout will look like this (until the next time we want to make a change!)
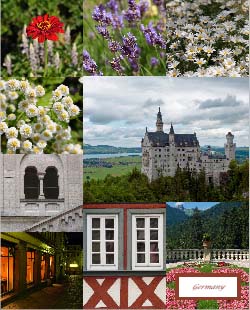
Our Final Advanced Montage Design
Can you see how we’ve sampled the color of the reddish wood in the window picture for our type and the stroke around the type box?
Saving Designed Layouts
Since a lot of effort goes into creating an advanced montage it makes sense for you to save your work for future use. This will allow you to recall your template at any time, saving you the time and effort of re-designing it.
To save a template, click on the Pager button to open the Pager tools. Then click on the button to open the Pager tools. Then click on the  button. You will be asked, via a pop-up window, to name a group for your template and a description of the individual template. Once saved, the template will go into your My Templates window. button. You will be asked, via a pop-up window, to name a group for your template and a description of the individual template. Once saved, the template will go into your My Templates window.
Here’s how this would work for our current layout:
1) Click on the Pager button. button.
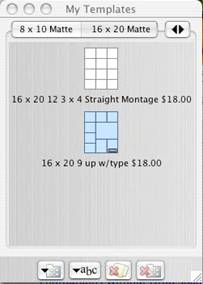
2) In you’re My Templates window be sure that you are within the Group you want to save the template in. In this case we will be saving our Advanced Template with our Basic Template in the 16 x 20 Matte Group.
3) Click the Save  tool. A window will open prompting you for a name for your montage. In our case we will type in “16 x 20 9 up w/type.” When you press “Return” the new design will be saved. Here’s what our new My Templates window will look like when it contains both our basic montage and the new, advanced one:
4) To retrieve the template for future use all you need to do is to double-click on the graphic in the My Templates window to bring it into your layout window.
Now you only need to drag-and-drop thumbnails into the template for a totally “fresh” montage.
Toggle the Pager and use its tools if you want to change the template for the new job. Then, save the revised template for future use.
You’ll soon have a great library of montage templates…and a lot of spare time on your hands!
|


