Creating Montage Prints With Gaps Between Picture Nodes
You can create increased visual interest in your montage simply by placing gaps between your photographs, giving your nodes borders (strokes) and placing your picture nodes on top of a black, colored or B&W background.
You’ll start just as you did with the “Basic” montage. The difference will be in how you’ll define your set-up screen. Once again we’ll be working on a 16” x 20” Design Your Own enlargement and utilizing the Pager button to activate the tools you need to make changes. button to activate the tools you need to make changes.
Here are the steps:
1) Click on the Montage button.

 2) The montage set-up screen will open. 2) The montage set-up screen will open.
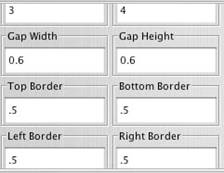
Note: In this example we’re setting up our montage print as a bordered enlargement with .6” gaps between the image nodes.
The montage is being set up for 3 image nodes across and 4 down on a vertical 16” x 20” enlargement.
We’re going to set a .5” top and bottom border and .5” left and right borders.
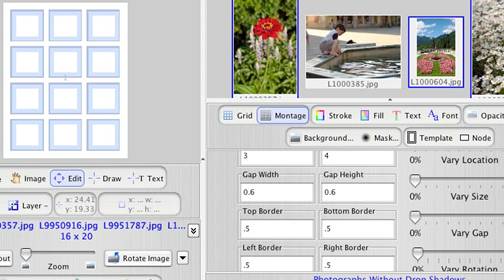
3) Click on the Create New Montage button and you’ll see a screen open that contains a visual graphic of the nodes you have defined. button and you’ll see a screen open that contains a visual graphic of the nodes you have defined.
4) Now we’re going to be able to use the Edit  tools in conjunction with other Pager tools to change the look of our montage.
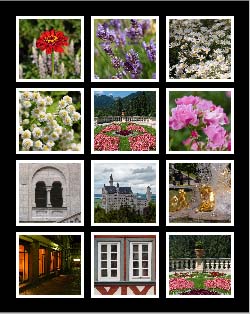
Our objective for this first example will be to add a .05” white stroke (border) around each picture and then place the pictures on a black background.
Let’s start by adding a border to each of the 12 picture nodes:
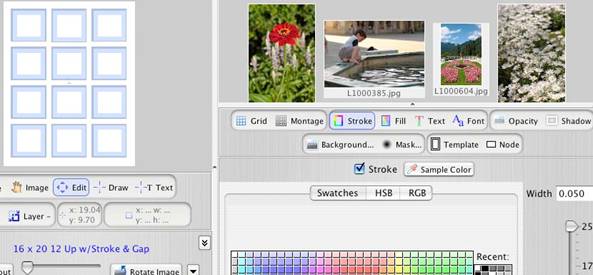
a. Click on the Edit  tool and select each of the nodes. They will show as a pale blue surround when they are selected (as shown above.)
b.Click on the Stroke  icon. The stroke selection window will open. In our example we’ll set the stroke to a .05 inch width and click on a white box (on the lower right) to select white as the stroke color.
Important Tip: This is how you will select any color you choose for a stroke or you can sample colors from your images using the eye dropper in the Sample Color 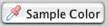 tool. tool.
c. Now select the background node by using the Edit  tool. 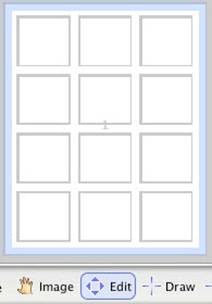
d. Click on the Fill  tool, check the Fill box and click on a black square. You’ll see your layout change to black with the white strokes showing. (Note that you could have used this technique to select any color, white or grey.) 
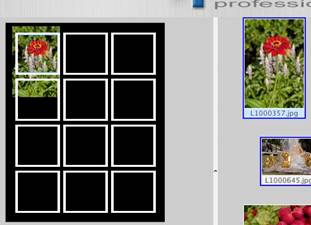
e. Your layout is complete. So, you can toggle the Pager  tool to turn off its tools and drag your thumbnail images into your layout.
|
|
Dragging Thumbnail
Images Into Nodes |
Finished Montage With White
Stroke on a Black Background |
|